Introduction:
In the dynamic landscape of Linux, users often find themselves on the hunt for a reliable “snipping tool for Linux” to meet their daily computing needs. A question frequently asked by Linux users is whether there’s a suitable replacement for the well-known Snipping Tool on Windows. In this article, we’ll be exploring the realm of snipping tools crafted specifically for Linux, dissecting various options to cater to diverse user preferences and needs.
Flameshot: Lightweight and Efficient Snipping Tool for Linux
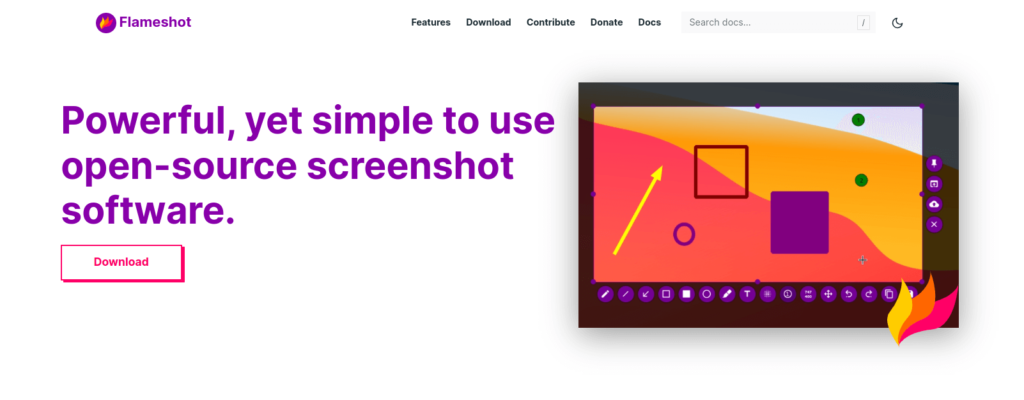
Overview: Flameshot is a lightweight and efficient “snipping tool for Linux” that focuses on simplicity and speed. It provides users with an easy-to-use interface for capturing screenshots quickly. Flameshot is ideal for users who prioritize a streamlined snipping experience without compromising essential annotation features.
Key Features:
- Quick Screenshots: Flameshot allows users to capture screenshots with speed and efficiency. The minimalistic interface ensures a straightforward snipping process.
- Annotation and Editing: While Flameshot may not offer the extensive editing features of some other tools, it provides essential annotation tools, such as adding text and arrows, making it suitable for users who want a lightweight yet functional snipping tool.
- Configurability: Flameshot offers some level of configurability, allowing users to customize hotkeys and other settings to match their preferences.
- Export Options: Users can save their snips in common image formats, providing flexibility in sharing and using captured screenshots.
Installing Flameshot on various Linux distros:
sudo pacman -S flameshot
# Or, to install from AUR:
sudo pacman -S flameshot-git
Debian 10+ and Ubuntu 18.04+:
sudo apt update  # Update package lists
sudo apt install flameshot
Fedora:
sudo dnf install flameshotVoid Linux:
sudo xbps-install flameshotSolus:
sudo eopkg install flameshotAlternative Options:
AppImage:
# Download the AppImage from flameshot.org
chmod +x flameshot-*.AppImage  # Make it executable
./flameshot-*.AppImage  # Run Flameshot
Snap/Flatpak:
# Using your distro's app store or command line:
sudo snap install flameshot
# Or for Flatpak:
flatpak install flathub org.flameshot.Flameshot
NixOS:
nix-env --install --attr nixos.flameshotGNOME Screenshot: Built-in Snipping Tool Functionality for GNOME Users
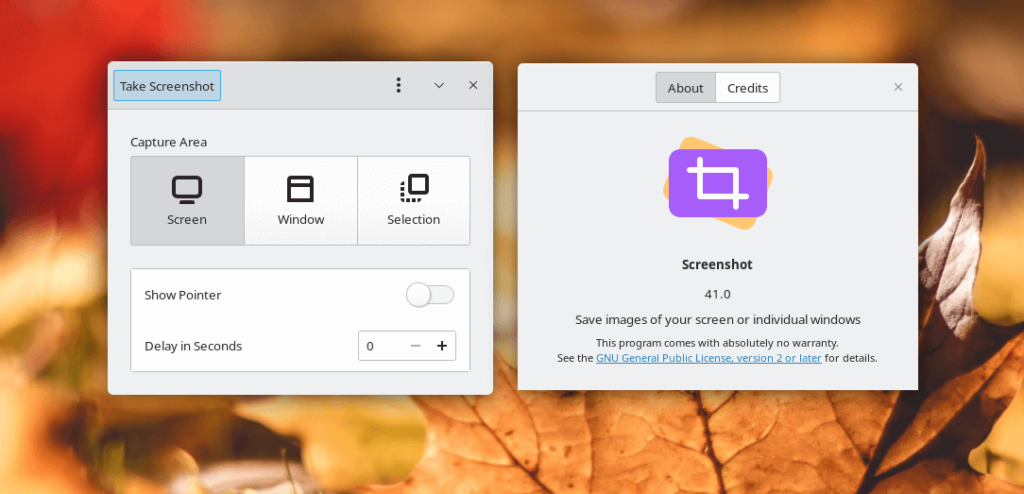
Overview: GNOME Screenshot is the default screenshot utility for the GNOME desktop environment. It provides a simple and integrated “snipping tool for Linux” experience for users who prefer the GNOME desktop environment.
Key Features:
- Capture Options: GNOME Screenshot allows users to capture the entire screen, specific windows, or custom regions, offering basic yet essential snipping functionalities.
- Ease of Use: As a built-in tool, GNOME Screenshot seamlessly integrates with the GNOME desktop environment, ensuring a cohesive user experience.
- Basic Annotation: While not as feature-rich as some third-party tools, GNOME Screenshot allows users to add basic annotations to their screenshots.
Usage: GNOME Screenshot is usually pre-installed on systems running the GNOME desktop environment. Users can access it through the application menu or set custom keyboard shortcuts for quick access.
Installing GNOME Screenshot on various Linux distros:
Ubuntu/Debian-based distros:
sudo apt update
sudo apt install gnome-screenshot
Fedora:
sudo dnf install gnome-screenshotArch Linux:
sudo pacman -S gnome-screenshotopenSUSE:
sudo zypper install gnome-screenshotOther distros:
- Search in your distro’s package manager: Most major distros include GNOME Screenshot in their repositories. Use your package manager’s search function to find it and install it.
- Build from source: If it’s not available in your distro’s repositories, you can download the source code from https://gitlab.gnome.org/GNOME/gnome-screenshot and compile it yourself.
Additional notes:
- GNOME-based desktops: GNOME Screenshot is often pre-installed on GNOME-based desktops, so you might not need to install it separately.
- Non-GNOME desktops: You can still install and use GNOME Screenshot on non-GNOME desktops, but you might need to install additional GNOME dependencies.
KSnip: A Cross-Platform Snipping Tool for Both Linux and Windows
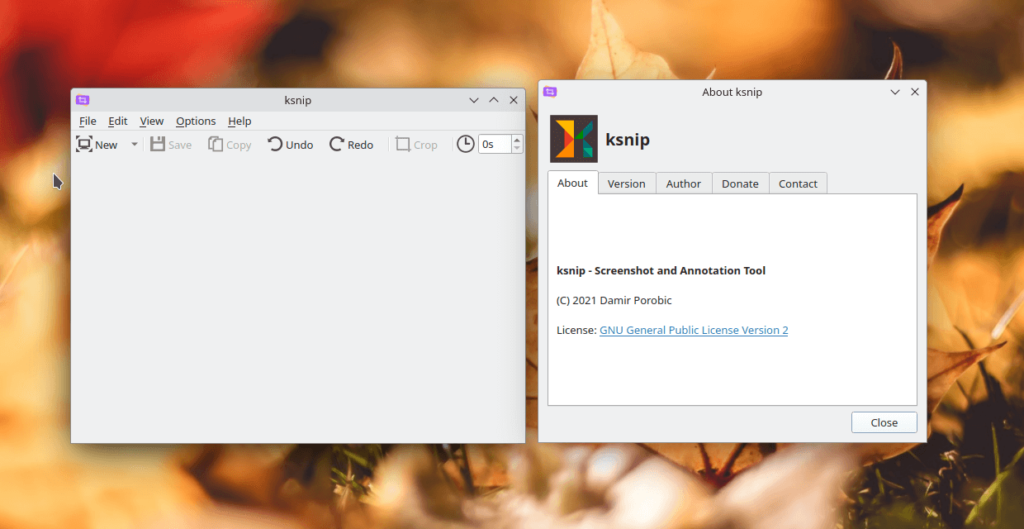
Catering to both Linux and Windows users, KSnip offers a cross-platform “snipping tool for Linux” with a user-friendly interface. Capture screenshots and annotate them effortlessly with KSnip. Supporting various file formats, this “snipping tool for Linux” provides the flexibility to save your snips in the format of your choice.
Key Features:
- Cross-Platform Compatibility: KSnip is designed to work on both Linux and Windows, offering a consistent snipping experience across different operating systems.
- User-Friendly Interface: With a focus on ease of use, KSnip provides an intuitive interface for capturing and editing screenshots.
- Annotation Tools: KSnip includes tools for annotating screenshots, making it suitable for users who require basic editing and annotation features.
installing Ksnip on various Linux distros:
Ubuntu/Debian-based distros:
sudo apt update
sudo apt install ksnipFedora:
sudo dnf install ksnipArch Linux:
sudo pacman -S ksnipopenSUSE:
sudo zypper install ksnipOther distros:
- Check your distro’s repositories: Ksnip is often available in the official repositories of many other distros. Use your package manager’s search function to find it and install it.
Snap: If it’s not available in your distro’s repositories, you can install it as a Snap package:
sudo snap install ksnipFlatpak: Alternatively, you can install it as a Flatpak:
flatpak install flathub org.kde.ksnipAdditional notes:
- KDE-based desktops: Ksnip integrates well with KDE desktops, but it can be used on other desktop environments as well.
- Dependencies: Ksnip depends on Qt5 libraries. If you encounter any issues, ensure that these libraries are installed on your system.
Command-Line Snipping with Scrot
Overview: Scrot is a command-line “snipping tool for Linux” that provides a fast and efficient way to capture screenshots using simple commands.
Key Features:
- Command-Line Efficiency: Scrot is designed for users who prefer the command line. It allows users to capture screenshots quickly by executing commands in the terminal.
- Lightweight: As a command-line tool, Scrot is lightweight and doesn’t consume significant system resources.
Usage: Users can capture screenshots using Scrot by running commands in the terminal. For example, to capture the entire screen, you can use the following command:
installing Scrot on various Linux distros:
Ubuntu/Debian-based distros:
sudo apt update
sudo apt install scrot
Fedora:
sudo dnf install scrotArch Linux:
sudo pacman -S scrotopenSUSE:
sudo zypper install scrotAdditional tips:
- Keyboard shortcuts: Create keyboard shortcuts to quickly launch scrot and capture screenshots.
- Aliases: Define aliases in your shell configuration to make scrot commands easier to type.
- Manpage: Refer to the manpage for scrot (
man scrot) for detailed usage information and options. - Online resources: Explore online tutorials and resources for more advanced scrot usage and tips.
Spectacle: Streamlined Screenshot Capture for KDE Plasma – A Comprehensive Overview
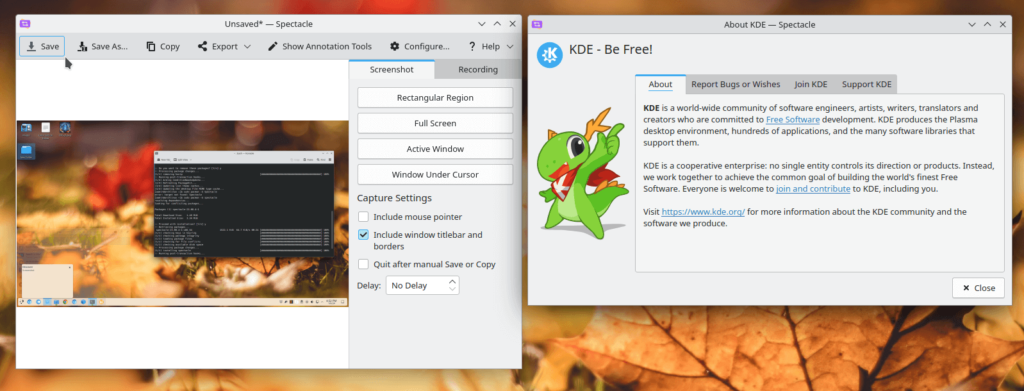
Overview: Spectacle stands as a noteworthy “snipping tool for Linux,” specifically designed for users of the KDE Plasma desktop environment. Serving as the default screenshot utility for KDE, Spectacle seamlessly integrates into the KDE environment, offering users a straightforward and feature-rich solution for capturing and managing screenshots.
Key Features:
- Intuitive User Interface: Spectacle provides an intuitive user interface, making it a user-friendly “snipping tool for Linux.” Its clear and straightforward design enhances the overall user experience, ensuring that users can effortlessly navigate through its features.
- Capture Modes: Offering various capture modes, Spectacle caters to diverse user preferences. Users can capture the entire screen, specific windows, or custom regions, providing flexibility in screenshot capture.
- Delayed Capture: Spectacle includes a delayed capture feature, allowing users to set a timer before capturing a screenshot. This feature is particularly useful when a delay is needed to prepare the content for capture, adding an extra layer of convenience.
- Annotation and Editing: While primarily a screenshot capture tool, Spectacle includes basic annotation and editing features. Users can add simple shapes, lines, and text to their screenshots directly within the application, enhancing its versatility.
- Integration with KDE Plasma: As the default screenshot tool for KDE Plasma, Spectacle seamlessly integrates into the KDE desktop environment. This tight integration ensures quick and easy access through the application launcher or custom shortcuts, enhancing user accessibility.
Installing Spectacle on various Linux distros:
Ubuntu/Debian-based distros:
sudo apt update
sudo apt install spectacle
Fedora:
sudo dnf install spectacleArch Linux:
sudo pacman -S spectacleopenSUSE:
sudo zypper install spectacleOther KDE-based distros:
- Spectacle is often included by default in many KDE-based distros. Check your application menu or package manager to see if it’s already installed.
Installation on non-KDE distros:
Snap:
sudo snap install spectacleFlatpak:
flatpak install flathub org.kde.spectacleAdditional notes:
- Dependencies: Spectacle depends on KDE frameworks and libraries. If you’re installing it on a non-KDE distro, you might need to install these dependencies separately.
- Integration: Spectacle integrates seamlessly with KDE desktops, offering features like:
- Global keyboard shortcuts
- Integration with KDE’s notification system
- Saving screenshots to KDE’s default screenshot folder
Shutter: Unleashing Comprehensive Screenshot Mastery on Linux
Overview: Shutter stands tall as a powerful and feature-rich “snipping tool for Linux,” offering an expansive set of tools designed to elevate the screenshot experience on the Linux platform. With its open-source nature, Shutter has become a go-to choice for users seeking more than just a basic screenshot utility.
Key Features:
- Screenshot Capture Expertise: Shutter excels in its primary function—capturing screenshots. Users can effortlessly capture the entire screen, specific windows, or custom regions with precision, providing versatility in screenshot capture.
- Advanced Editing Capabilities: Going beyond simple capture, Shutter offers advanced editing features. Users can crop images, add annotations, and draw shapes directly within the application, providing a comprehensive set of tools for enhancing captured content.
- Export Flexibility: Shutter supports various file formats, offering users the flexibility to save and export their screenshots in formats such as PNG, JPEG, or others. This versatility ensures compatibility with different applications and platforms.
- Plugin System for Extensibility: Shutter embraces extensibility with its plugin system. Users can enhance Shutter’s functionality by incorporating plugins, allowing for customization based on individual preferences and requirements.
- Social Media Integration: Sharing your annotated screenshots is seamless with Shutter’s integration with various social platforms. Users can quickly share their edited captures on social media or through other communication channels directly from the application.
Installing Shutter on various Linux distros:
Ubuntu/Debian-based distros:
sudo apt update
sudo apt install shutter
Fedora:
sudo dnf install shutteropenSUSE:
sudo zypper install shutter
Other distros:
- Check your distro’s repositories: Shutter is often available in the official repositories of many other distros. Use your package manager’s search function to find it and install it.
- Snap: If it’s not available in your distro’s repositories, you can install it as a Snap package:
sudo snap install shutterKazam: Empowering Linux Users with Effortless Screen Capture

Overview: Kazam is a standout “snipping tool for Linux,” renowned for its simplicity and effectiveness in screen recording and capturing on the Linux platform. With a focus on providing users with a straightforward yet powerful solution, Kazam has become a popular choice for those seeking an uncomplicated screen capture experience.
Key Features:
- Screen Recording Prowess: Kazam excels in screen recording, offering users the ability to capture the entire screen or specific areas with ease. This makes it a versatile tool for creating tutorials, demonstrations, or simply recording your desktop activities.
- Flexible Capture Options: Users can choose from various capture modes, allowing for the capture of the entire screen, individual windows, or custom regions. Kazam’s flexibility ensures it caters to a wide range of user needs and preferences.
- Configurable Frame Rate and Quality: Kazam empowers users with control over the frame rate and recording quality, ensuring that the captured content meets specific requirements. This feature is particularly beneficial for users who prioritize customization in their screen recordings.
- Simple User Interface: Kazam’s user interface is designed for simplicity, making it accessible to users with varying levels of technical expertise. The straightforward layout ensures users can quickly navigate the application to initiate screen captures.
- Integration with Popular Linux Distributions: Kazam integrates seamlessly with various Linux distributions, making it easily accessible to users across different platforms. Its compatibility ensures that users can enjoy a consistent screen capture experience.
User-Friendly Experience: Kazam focuses on providing a user-friendly experience, allowing users to start capturing their screens with minimal effort. The uncomplicated interface ensures that users can quickly adapt to the tool’s functionalities.
As a reliable “snipping tool for Linux,” Kazam brings efficiency to screen recording and capturing, enhancing the overall user experience on the Linux platform.
Installing Kazam on various Linux distros:
Ubuntu/Debian-based distros:
sudo apt update
sudo apt install kazam
Fedora:
sudo dnf install kazamArch Linux:
sudo pacman -S kazamopenSUSE:
sudo zypper install kazamOther distros:
Search your distro’s package manager: Kazam is often available in the official repositories of many other distros. Use your package manager’s search function to find and install it.
Flatpak:
flatpak install flathub org.kde.kazamAdditional notes:
- Dependencies: Kazam might require additional dependencies like gstreamer-1.0. Kazam’s documentation outlines these dependencies for different distros.
- GUI vs. CLI: Kazam offers both a graphical user interface (GUI) and a command-line interface (CLI). The installation methods above install the GUI version. You can use the
kazamcommand in the terminal to access the CLI options.
Conclusion:
the diverse ecosystem of Linux provides users with a myriad of choices for a “snipping tool for Linux.” Whether your preference lies in feature-rich applications, lightweight and efficient tools, or integrated solutions, the Linux community caters to a spectrum of needs. By exploring these options, users can find the ideal “snipping tool for Linux” that aligns with their preferences, enhancing their overall computing experience.
You Might be intersted in: Top Linux Screen Recorders: Elevate Your Content Creation with the Best Tools for Linux